Spray paint blending
Learn how to master spray paint blending and gradients. Expert tips on can control, cap selection, and step-by-step techniques from pro graffiti artists.
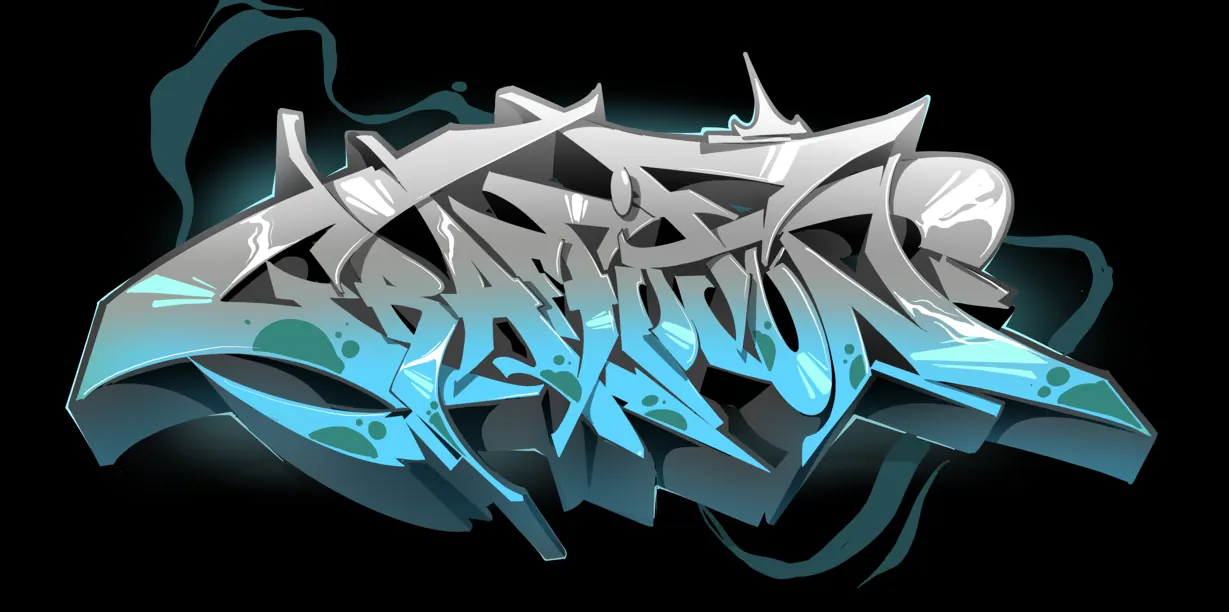
Spray paint blending is one of the most visually impressive skills in a graffiti artist's toolkit. It is the art of creating smooth, seamless transitions between colours, allowing for breathtaking 3D effects, realistic shadows, and vibrant "sunburst" gradients. Whether you are working on a complex graffiti piece or a large-scale mural, mastering the fade is essential. In this comprehensive guide, we draw on years of professional experience from the Graffitifun team to break down the mechanics of aerosol blending. You will learn the importance of can control, the best equipment for the job, and the step-by-step methods used by professionals to achieve flawless results every time. Let's dive into the mist! 💨
The fundamental principles of blending spray paint
In the world of urban art, the ability to merge one colour into another seamlessly is what separates a basic sketch from a professional-grade graffiti piece. Blending, also known as creating a gradient or "fading," is the process of transitioning between two or more hues without visible harsh lines. This technique adds depth, realism, and a luminous quality to your work.
Professional graffiti artists rely on a combination of muscle memory, pressure control, and an understanding of paint chemistry. Unlike traditional oil painting where you mix pigments on a palette, spray paint blending happens directly on the surface (the "wall") through the strategic overlapping of fine particles of paint. 🎨
Understanding the "Mist" factor
The key to a successful blend is managing the overspray. When you press the nozzle, the paint doesn't just hit one spot; it creates a concentrated centre with a softer, misted edge. Blending leverages these soft edges. By layering the mist of Colour A over the mist of Colour B, you create a third, intermediate hue that tricks the eye into seeing a smooth transition.
Essential equipment for smooth gradients
While a skilled artist can blend with almost any tool, having the right gear makes the learning curve significantly less steep. At our workshops, we emphasize that 50% of the result comes from the "hand" and 50% from the "tool."
- Low-Pressure Cans: These are vital for beginners. Low pressure allows for slower paint delivery, giving you more time to adjust your hand movements.
- Soft Caps: For blending, you want a cap that produces a fuzzy edge. Large "fat caps" are great for big fills, but "soft" or "faded" caps are designed specifically for transitions. Refer to our guide on cap types for more details.
- Complementary Colour Palettes: Blending works best when colors share a base (e.g., merging dark blue into light blue). Trying to blend complementary colours like purple and yellow often results in a "muddy" brown transition if not handled with expert precision.
Step-by-step guide: The horizontal gradient (How-to)
Follow these steps to master the basic horizontal fade, a staple technique for any fill-in.
- Surface Preparation: Ensure your wall or canvas is primed. A smooth surface allows the paint particles to sit evenly.
- Apply the Base Colour: Spray your first colour (the darker shade is usually easier to start with) over the top half of your designated area. Stop with a "dusty" edge—don't make the bottom line sharp.
- The Distance Adjustment: Hold the can further back (about 20-30cm) from the surface than you would for a sharp line. This increases the spread of the mist.
- Angle the Can: Tilt the can slightly. Instead of spraying directly at the wall, angle it so the spray "kicks" towards the next colour.
- Introduce the Second Colour: Start spraying the second colour from the bottom up. As you approach the first colour, lighten your finger pressure and increase your hand speed.
- The "Cross-Fade" Pass: Go back to the first colour. Spray a very light "dusting" over the transition area. Repeat this back-and-forth movement until the line vanishes.
Beginner vs. advanced adaptation
Blending is a scalable skill. How you approach it depends on your current level of can control. 🚀
Beginner: The "Stupid-Simple" Method
Beginners should focus on using "translucent" or "transparent" spray paints if available. These paints have less pigment, meaning you can layer them multiple times to build up a blend slowly without making a mistake. Another tip is to use shades from the same "colour swing"—for example, three shades of green from the same brand. The chemical compatibility ensures they melt together naturally.
Advanced: Wet-on-Wet and High-Contrast Blending
Experienced artists often use "wet-on-wet" techniques, where they apply the second colour while the first is still tacky. This allows the physical pigments to mix on the wall. Advanced blending also involves "non-linear" transitions, such as blending a deep black into a bright neon pink, which requires a mastery of "grey-scaling" or using a neutral mid-tone to bridge the gap between high-contrast colours.
Common errors and how to fix them
Even professional artists encounter issues when blending. Recognizing these early is key to a clean finish.
1. The "Hot Spot"
The Issue: A circular patch of concentrated paint in the middle of your blend.
The Fix: This is caused by stopping your hand movement while the nozzle is still pressed. Always start moving your hand before you press the cap and keep moving until after you release it.
2. Muddy Colours
The Issue: The transition looks dirty or brown.
The Fix: You are likely mixing colours that are too far apart on the colour wheel. To blend red into green, you must use an intermediate colour like yellow or orange in the middle to act as a buffer.
3. Dripping
The Issue: Paint starts to run during the blending process.
The Fix: Blending requires multiple passes. If you try to achieve the perfect blend in one go, you'll apply too much paint. Spray a light layer, wait 30 seconds, and do another pass. If drips occur, see our guide on drips in graffiti to turn them into a style choice.
Training progression: From zero to pro
We recommend this 4-week training schedule for those practicing at home or in a studio environment:
- Week 1: Distance control. Practice spraying "dots" from different distances to see how the fuzziness changes.
- Week 2: Two-tone fades. Master the transition between a dark blue and a light blue on a flat board.
- Week 3: Three-tone rainbows. Attempt to blend three distinct colours (e.g., Red -> Orange -> Yellow) over a large area.
- Week 4: 3D Blending. Use your skills to create a sphere, using blending to simulate a light source and shading.
The role of blending in different styles
Blending isn't just for realism; it's a tool for style. In a Wildstyle piece, blending is used within the complex letter structures to make them "pop" against the background. In a Mural context, blending is essential for skin tones, sky gradients, and fabric textures. Even in a Throw-up, a quick "dusty" fade can give a two-colour piece a much more "expensive" and finished look. ✨
Workshop application: Learning with the pros
In a Graffitifun workshop, blending is one of the most exciting moments for participants. Seeing two separate colours become one fluid motion is often the "aha!" moment for new artists. Our professionals demonstrate the "flick of the wrist" technique, which is hard to learn from a video but easy to grasp when seen in person. We provide high-quality low-pressure cans to ensure every student, regardless of age, can achieve a smooth gradient on their first day.
Expert attribution
This guide was compiled by our senior instructors at Graffitifun. With over a decade of experience in urban art education and thousands of workshops delivered globally, our team consists of professional graffiti artists who have mastered the art of the aerosol. We believe that with the right technique and professional-grade materials, anyone can master the complex art of spray paint blending. Our methodology focuses on safety, can control, and the joy of creative expression.
Frequently asked questions
Keep reading
Ready to Create Your Masterpiece?
Book your graffiti workshop today and discover the artist within! It's going to be AWESOME!